|
|
|
|
|
![]()
HOW CAN I MAKE A LIGHTSABER?
Have you ever wanted a prop replica of Darth Vader's Lightsaber? Well, This is how you do it!
| NOTE: this is a graphic intense page. Please be patient as the pictures load. The process will be much easier to understand if the pictures are seen. |
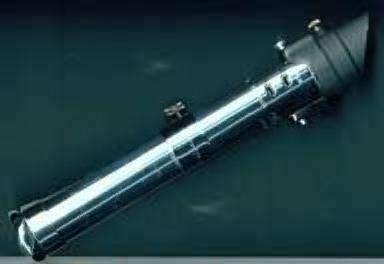
| Step
1: What first?
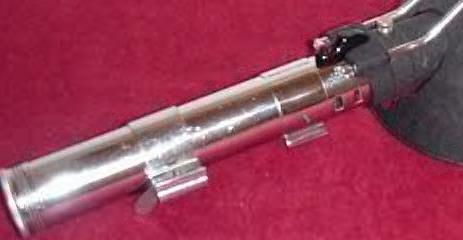
Begin by acquiring a Heiland Synchronar 3-Cell Photo Flash Unit (pictured at right). These were used in the 1940's with large format cameras. One of the best places to find a Heiland Synchronar Flash Unit is on eBay. |
 |
| Step 2: How do I get one?
Step 3: Clean it up Once you receive the flash unit, use a metal polish to remove any rust or stains.
|
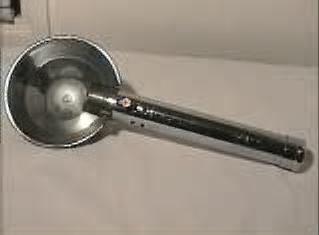
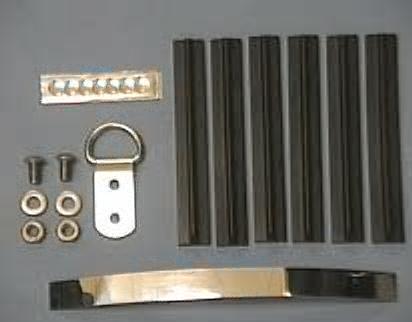
| Step 4: Parts
The grips used in the films were off a British vehicle. I recommend you purchase pre-made grips from EDC Studios. Also get a d-ring assembly (shown in pic) and also some mylar tape you can get at a hardware store. |
 |
| Step 5: Grips | |
| Position one grip on the bottom half of the
tube and continue to line them up exactly 60 degrees away. Making sure you leave an even amount of space in between the grips! You'll need six grips to complete the handle. |
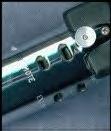
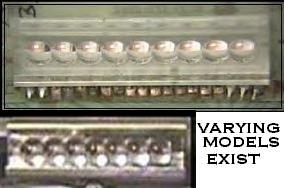
| Step 6: The Activation Switch | |
| To make the activation switch, you'll need to find
an old calculator. A Texas
Instruments TI -1200 will probably be the most common. TIP: Look at flea markets, yard sales and Goodwill stores. Place double sided tape on the back of the bubble strip. Slide a piece of mylar tape in the clamp (part in middle of flash) and place the six to eight display bubbles in the clamp, on top of the tape.
|
 |
| Step 7: D-ring assembly (optional) | |
| You don't have to add this but it looks great is you can clip your saber to a belt. Although the D-ring wasn't added to the one on the movie, it still looks cool to show it off. Do not drill holes!! Punch them with the proper equipment! Drilling can damage the flash!! | It's fun to add stuff others haven't done before; strive
to be different!
= ) |
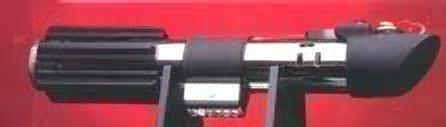
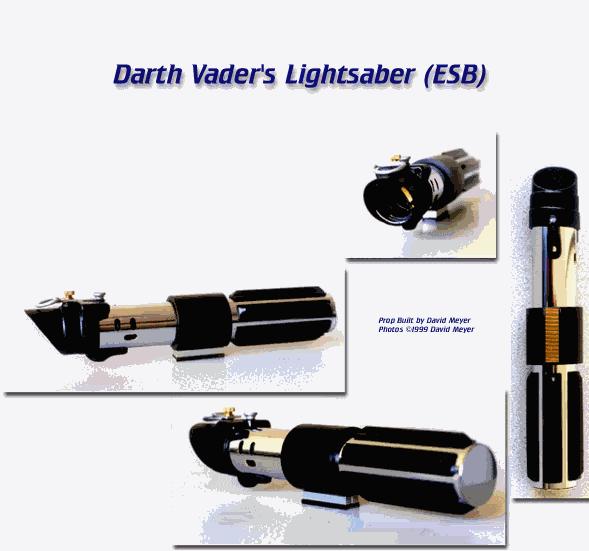
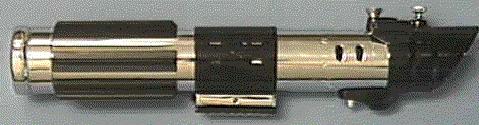
| Step 8: Finishing up | |
| This section is just to show what the finished product looks like and the following pics are of many different angles to help you add the correct pieces in the right places. You've done it! Congrats Lord Vader. | 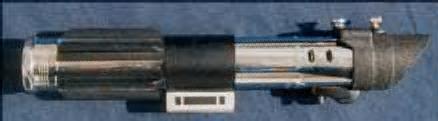 |
|
 |
|
|